
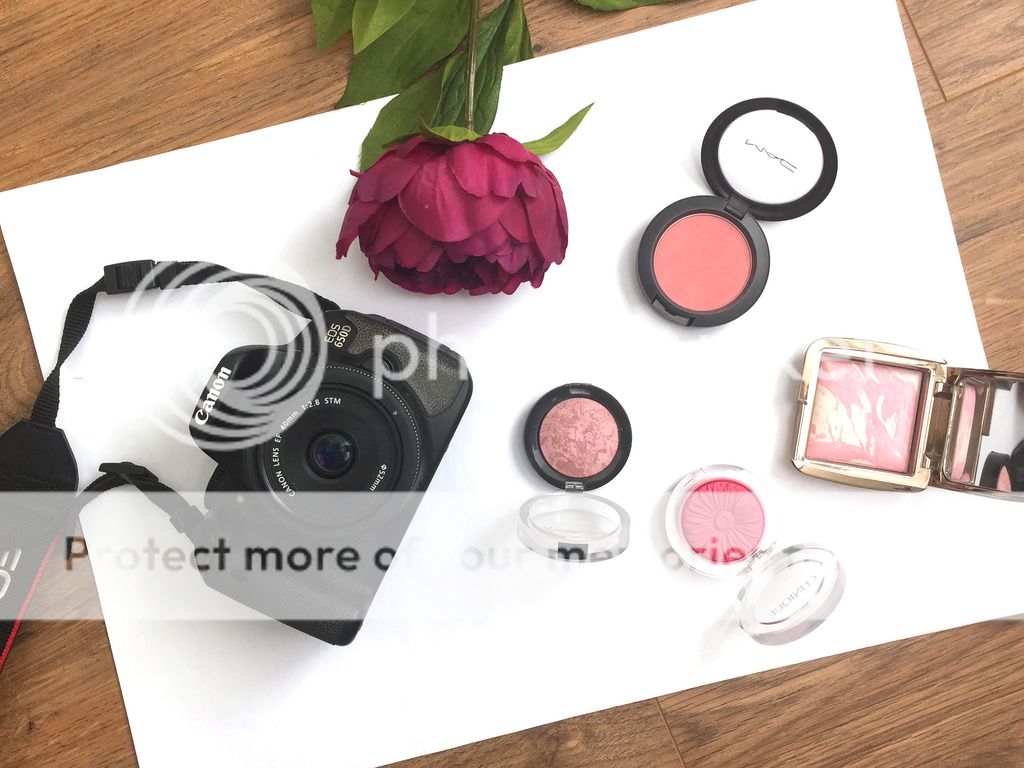
Before I get started though, I want to point out a couple of things! First of all, you don't NEED a SLR camera if you have a blog. The picture below was actually taken on my iPhone, an SLR is a huge investment. I only have mine as I work in the video/photography industry, so I needed it for university and work. My second point is that I'm in no means suggesting that I'm camera professional, or that my pictures are perfect. This is all knowledge I've picked up from blogging and working!
So you stick your camera into manual and you've got a whole load of options to choose from and tinker with. My camera is a Canon 650D, lots of Canon cameras will have identical settings to mine, but if you use a different brand, you're likely to have the same options too. If you've played with the settings before on your camera, you might want to restore to default settings.
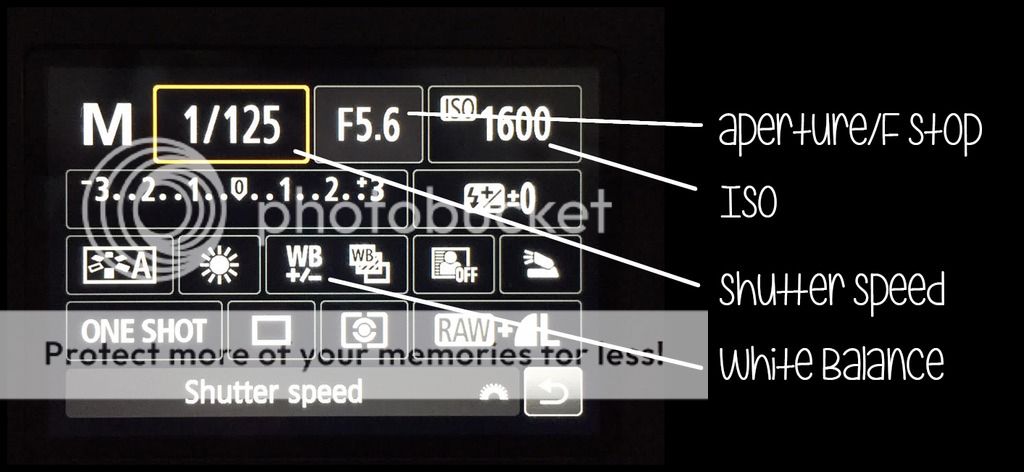
ISO - how much light do you want to let into your lens?
The ISO on your camera controls how sensitive your camera is to light and essentially how much light you let into your lens. The lower the number, the less light you're letting in. I often find that the 'golden' number for me is 400. If it's a particularly bright day I can get away with 200 and if it's dark I need to up it to 800. Beware of placing your ISO above 800; a high ISO makes your image more grainy and blurry. Tinker with this until you have the level of brightness you need, change as appropriate.
Aperture - how much of the scene do you want to be in focus?
I'm a huge lover of depth of field and I like to tinker with this option quite a lot. The Aperture or 'F Stop' refers to how much of a picture is in focus. It's the setting that has a letter F in front of it, eg. F5.6. If you're taking a picture of a product and you want the background to be blurry, this is the setting you should change. A small F Stop (eg. F2.8) means that the subject or product stands out and the background will be blurry. A large F Stop (eg. F11) means that the whole scene will be in focus.
Shutter speed - how long does it take for the camera to take the picture?
This is an option that I basically never tinker with, as once you've found your perfect setting you rarely need to change it. Certainly with beauty photography anyway! The numbers here refer to how quick/slow the 'shutter speed' is on your camera. This basically refers to how quickly your camera takes the picture. If the shutter speed is too slow, it will let in a lot of light, but you're likely to get a blurry photograph. If it's too fast, you won't get enough light into camera. Most of the time, the default option is perfect for beauty photography. If you've tinkered with this before, try changing it to something 1/125.
White balance - does white look white?
When you put your camera into manual, you often have the chance to adjust your white balance. White balance refers to the colour balance and essentially how your camera is interpreting white. Most of the time on automatic, your camera is actually too blue or too orange. White balance is incredible important with beauty photography, as you want your colours in the products to be true to what they actually are. It's easy to adjust your white balance, grab a piece of white paper and adjust the settings until the white paper looks white. This time the settings are likely to be words like 'sunlight' or 'cloudy' - I find that these normally have no bearing to the actual weather, so don't be put off.
I really hope you find this useful, let me know in the comments below! If you have questions on any other settings, leave them in the comments below or tweet me (@hopefreedomlove).